Children often get a lot of satisfaction about the end product when they are making a craft. There is a fine balance between process (what a child gets out of the experience) and product (what the end product looks like).
When children are young, they will sometimes show frustration with how their finished product looks and if they have perfectionist qualities, this can be quite difficult to handle.
It is important that children have the opportunity to show their creativity and to use their imagination, but sometimes it is very rewarding for them to produce something that either:
a) serves a purpose (like a place mat, a coaster or a bookmark)
or
b) looks more “grown up”
This is where Straw Weaving comes in. It definitely has an end “product focus”. While it is an activity that an adult most likely must start, it is also an activity that can have a positive outcome that will likely leave a child feeling great pride and accomplishment. I recommend this activity for children 5 and up.
- drinking straws (the number of straws depends on how thick the desired outcome is)
- wool (multi-coloured wool looks great with this activity)
- plain, thick string (one piece per straw), cut the DOUBLE the desired length of the end project
- thick needle to poke holes in straws
- scissors
Suggestions:
- Straws with a large diameter would work really well for this activity.
- Once set up, you may wish to cut the straws for easier handling.
- Straight drinking straws are recommended as flexible drinking straws are more difficult to use.
Directions:
- Cut one piece of string (double the length you would like your project to turn out) per straw.
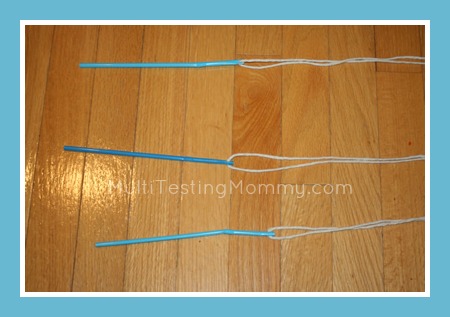
- Poke two holes through the ends of each straw so that you can lace the cut strings.
- Lace one piece of cut string through each straw so that each straw has two string ends dangling.
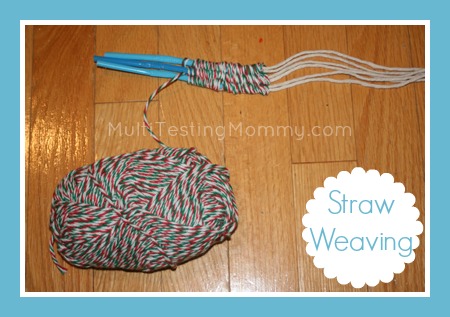
- Line up the straws side by side and tie one end of your “project wool” to the end straw close to the bottom where the other strings are hanging.
- Begin weaving the wool over and under each straw, back and forth. Keep the work as tight together as possible.
Occasionally push your work down towards the bottom of the straws (where the dangling strings are). - Once you have a couple of inches worth of weaving, begin to push it off the straws and onto the dangling strings.
- Once your work has moved down to within one inch of the bottom of the dangling strings (or more if you desire “fringes”), your weaving is complete.
Ideas for Finished Work:
- headbands
- bracelets
- belts
- bookmarks
- collars for pets or stuffed animals
This post is being featured in Artsy Play Wednesday Link Up!


So let me get this straight…there is a craft involving yarn, and I am just hearing about this now???? I will need to put this on our summer to do list!!
Thanks for linking up with my comment love linky, you can link up again NOW!! 😛
This is so cool! I have never seen this before! My girls and I will have to try this!
This would make such a nice bracelet! You are SO crafty, it must be awesome for your kids!
Victoria Ess
How much fun would this be? I think one of my grandkids could do this and be successful! Thanks for the idea and instructions!
RAFFLECOPTER NAME is Anne Taylor